Designing a Sensory Cake

This cake was request by Eleanors parents to help celebrate her 10th Birthday. Eleanor has health issues that mean she is severely visually impaired and as such we needed to ensure she was able to enjoy her cake in different ways to most 10 year olds. Read about her journey here

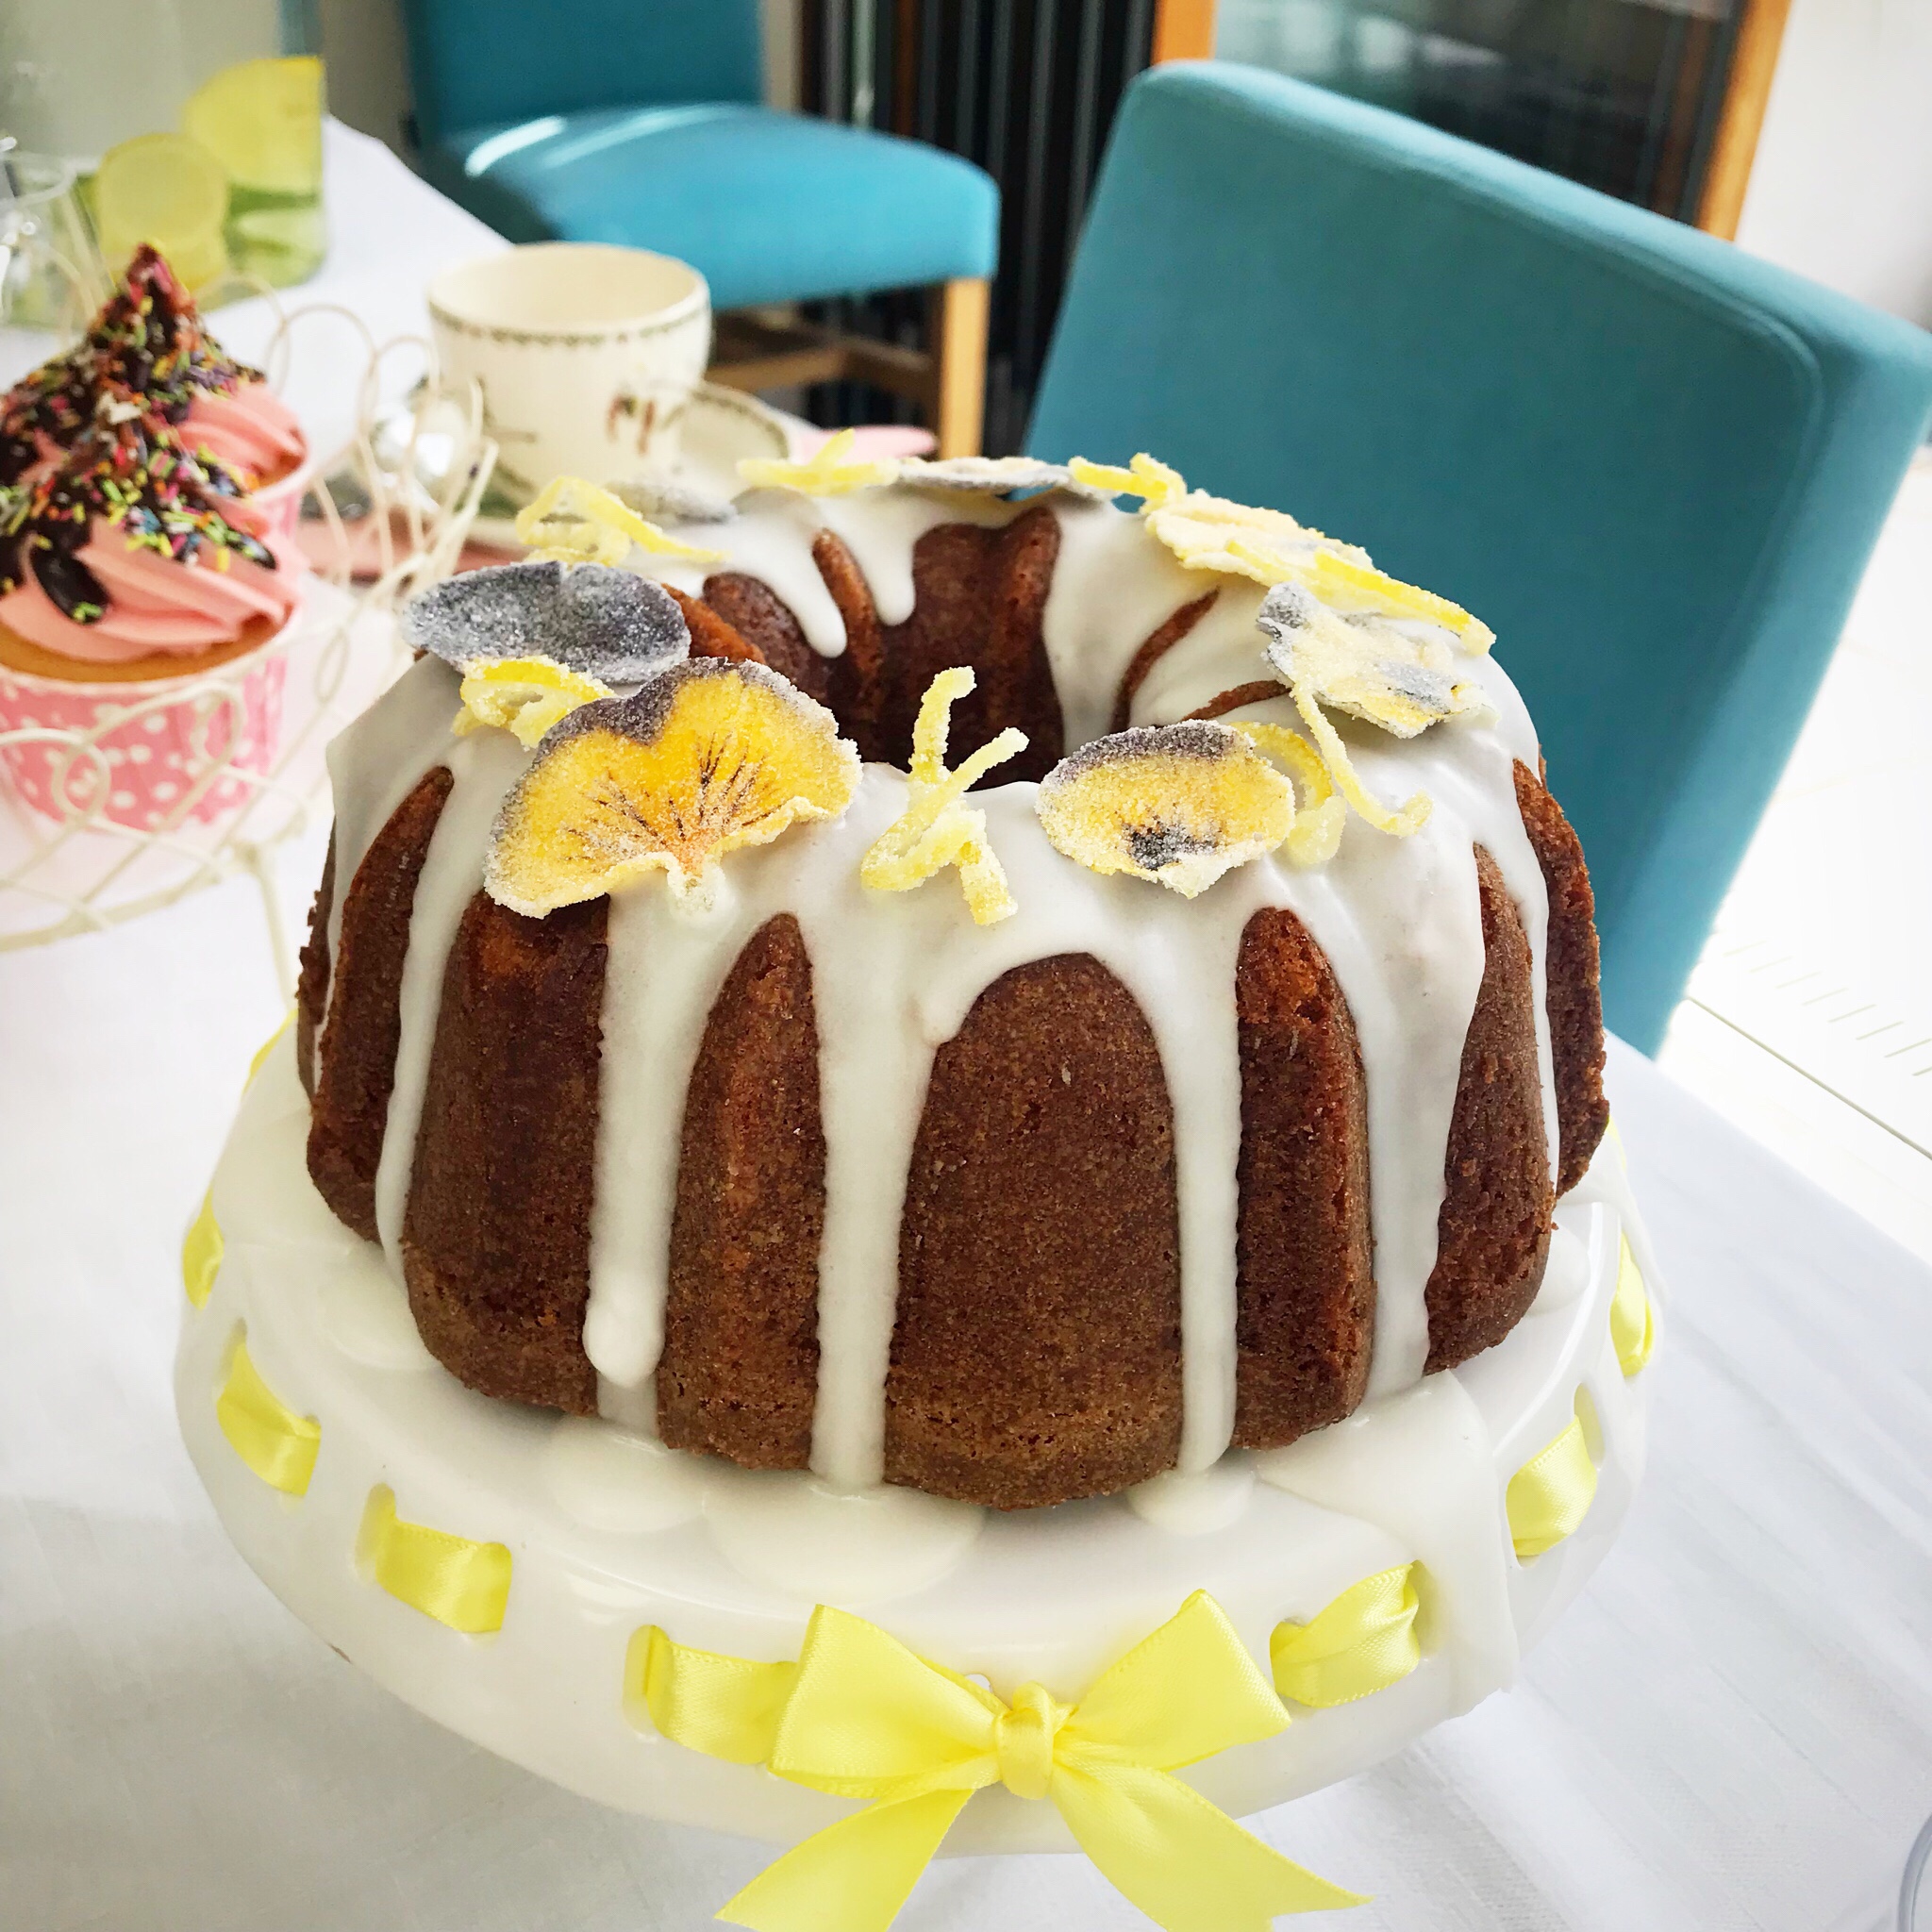
I was asked for a lemon and elderflower semi naked drip cake – easy enough to start with, one of my classic flavours in a signature style – no problem!

Can the drip please be purple or royal blue? Okkaaay I thought cake designer head on – how can I make that work? – because Eleanor can identify those colours – of course I can make that work!

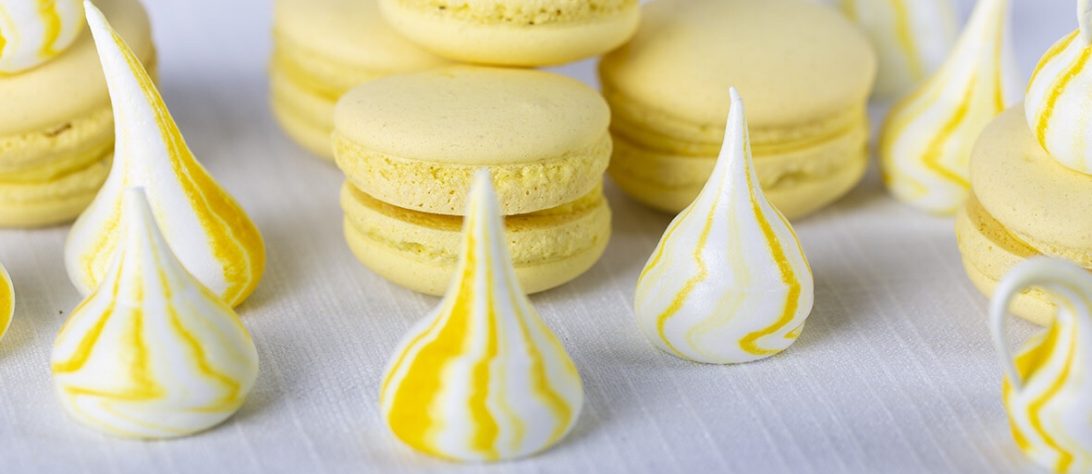
Would you prefer macarons or meringues ? Either were fine,no food allergies to consider – so I did both I used the meringues to marry the yellow from the lemon cake and the purple element of the drip. The macarons allowed me to go colour-tastic going full on purple! I used an oil based colour brand Americolor to give that vibrancy I was after.

And she loves Harry Potter can we included that? At first I felt the cake might become too confusing and was just going to focus on the main elements we had already. But then the brain started slowly whirring and I realised I could use the board to included elements that she could lift of touch, feel smell and taste. The sorting hat is made using modelling chocolate, the other models are made from coloured and flavoured flower paste. I wanted everything to dry hard so they could be easily handled. The wand was flavoured with liquorice, the scarf raspberry, the glasses peppermint all from Foodie Flavours and the snitch was bubblegum flavour by Beau . I attached them all to the board with a dab of white chocolate so they could be easily lifted off for Eleanor to explore. I also had a treasure stash of Bertie Botts Harry Potter All Flavour Jelly Beans as an extra detail.

Really importantly I was asked to include a birthday message in braille. I was sent the formation of the words and an explanation of how it all works – which of course I just skimmed and missed a crucial explanation of how braille works where not all the shapes equal a letter some make sounds.

So after a quick panic that I had got it wrong and a short email exchange all was ok! I found the easiest way was to use mid sized sugar pearls. I marked out the formation with pins then stuck the pearls to the board and translated the words in purple above. This allowed the braille to be read without damaging the dots.

Finally the star of the show for me is the flowers. Annie from There May Be Bugs first introduced me to the Stollery family during UK lockdown number one. They were strictly shielding at the time and Annie wanted to treat them to something doughnutty so I made them some duffins! The delicious hybrid muffin/doughnut were apparently a huge hit. Its a great recipe by the way from the BBC Good Food website if you want to make some.

Annie grows the most beautiful flowers in an organic environment some of which are edible varieties and I have used them on my cakes in the past. On contacting Annie she had some flowers that would be perfect and really came up trumps. A mix of violas, pansies, primula, forget-me-nots with some rosemary for fragrance gave me a purple triumphant mix to play with.

Eleanor and her family collected her cake on her birthday. She is such a delight, so excited about her birthday and opening her presents. She read her braille and it worked yay! It was all quite an emotional journey for me but nothing compared to what Eleanor and her parents live through daily. All proceeds for this cake have been donated to the Amber Trust who support Eleanor

Happy 10th birthday Eleanor it has been an honour to create this cake for you.

Making sugarpaste models with Debbie Brown

These days I am usually so busy with cake commissions I don’t often give myself any time to learn new skills but when I saw this course advertised by the very lovely Danielle at Richmond Cake School I just couldn’t pass up the chance to improve my modelling skills and with such an esteemed teacher as Debbie Brown it was a no brainer.

To top it all the subject was just so cute and I really wanted to learn how to model properly.

The course was held in a local hall attached to a pub (already winning!) all the equipment and sugarpaste were provided as were refreshments and lunch. So lovely to just have to turn up and not think about anything else. That in itself felt like a proper luxury.

The first job was to cover the board using an inlay technique to get the stripes for the rug effect.

We used Saracino modelling paste for everything, it’s very strong and flexible – perfect for modelling.

Once the cushion was made we starting on the body first watching Debbie demonstrate then giving it a go ourselves. The Saracino paste really came into its own creating a lovely smooth pliable model but that held its shape well.

We used a polystyrene ball as the base for the head shape and started it off with highlighting some of the facial features which were then left to dry whilst we carried on with the legs.

Debbies demonstration of the leg making was incredible – she is so quick and agile and her modelled legs and feet looked instantly perfect. Naturally my efforts took a little longer – even squishing it all up and starting again at one point much to Danielles horror! But Debbie was always on hand with advice if you needed it.

After lunch the base facial features had dried and hardened enough to start building up the face. Adding an overlay to the base then using your hands and modelling tools to create the face was certainly something I need to practice more. My face looked quite alien like for a long time and to be honest I didn’t really like it until I added the hair, but each stage starts to bring it to life as you add eyes, and blush highlights. All the time the Saracino stayed maleable allowing you to smooth and adjust until you are happy, although this can mean you distort things unintentionally so be careful!

Next we spent a little time making books and then moved onto the arms and hands, not quite as tricky as the legs but not far off – fingers are very fiddly!

The final step was to add hair which we started off it large sections then added the strands to bring it to life (Oh and eyebrows – they are sisters not twins remember, no need for them to be identical!)

So where did that day go – completely absorbing and I would love to do another course with Debbie and Danielle.


I didn’t stop there though as when I got her home she had a bit of a makeover for my blonde, hazel eyed, I-Pad, yoga loving daughter who was 19 this week – I just could not put her on a cake could I?!

Silver Jewellery making with Grace and Flora

Last weekend a group of friends and I went to make silver earrings with Kate from Grace and Flora . It made such a wonderful creative change from making cakes that I wanted to share our experiences with you.

Kate has set up her workshop in her pretty garden in Twickenham – it is a lovely airy space well equipped with all we needed for our session with added pretty touches reflecting her love of nature.

Kate makes beautiful silver and beaded jewellery which she sells on her Etsy site and has recently started to run workshops to teach others some of the basic skills. I found her through the wonder of Twitter and Instagram posts and booked the course for 5 of us.

We started the session by talking through our experiences with other past jewellery courses (largely not very positive unfortunately) but Kate was so welcoming and calm that we felt very reassured that this experience would be completely different.

She showed us some examples of earring that we could make – a variety of styles made using silver wire and strips of silver.

img_2070

She then proceeded to go through the process for us, showing in detail how to get the styles started, we needed to cut file, shape and solder the pieces.

The soldering was definitely the trickiest part of the process to get right for me but totally fascinating when it did work!

img_2088

Kate was always on hand to help us whenever we needed her and enabled us to make a variety of styles of design some dangly some on posts, some wire some using strip metal and with a whole host of finished and shapes.


It was amazing to see my earrings progress from a coil of wire through all the stages to the finished article.

Everyone was delighted with their finished pieces and we will definitely be back to learn more skills and try some of the other courses Kate has to offer.


Red Velvet and Malteser traybake for Comic Relief

If you are holding a cake sale for Red Nose Day traybakes are the ideal way to quickly bake lots of cakes and raise more money for your sale. Comic Relief is a great cause and these red velvet cakes with a white chocolate buttercream and crushed malteser topping are bound to be a hit and the red nose maltesers hit the theme perfectly.

.albumtemp-80

Recipe

Cake

  • 115g butter
  • 225g golden caster sugar
  • 2 medium eggs
  • 160g plain flour
  • 1 tablespoon cocoa powder
  • 1/2 tsp bicarbonate of soda
  • 1/4 tsp salt
  • 3/4 tsp white wine vinegar
  • 125ml buttermilk
  • 1/2 tsp vanilla extract
  • red food colouring

Topping

  • 150g butter cubed and left to soften at room temperature
  • 300g icing sugar
  • 75g white chocolate
  • 150g crushed maltesers

Red noses

  • 18 maltesers
  • 50g red candy melts
  • 25g double cream


Method

Grease and line with greaseproof paper a 30x20cm traybake tin.

Preheat the oven to 160C (fan)

Weigh out all the ingredients ready in 3 bowls. Put the butter and sugar in a large bowl. In a separate bowl hand whisk together the flour, cocoa powder, bicarbonate of soda and salt. In a further bowl mix the buttermilk, vinegar, vanilla and food colouring. I went for it with the food colouring on this one as I wanted a strong red colour for the theme. I use Sugarflair red extra paste about 1/2 tsp, try to use strong pastes or gels rather than supermarket colours as they don’t have the strength to get a good finished colour.

img_1502

Cream the butter and sugar together until light and fluffy

Add the eggs one at a time and mix well between each addition until fully incorporated.

Add 1/3rd flour mix and half the buttermilk, fold in carefully. Repeat, then finally add the last of the flour. Fold in then beat briefly to get a smooth batter.

img_1503

Fill and level the traybake tin and put in the oven for 25 mins or until the sponge springs back when touched and a cocktail stick comes out clean when pushed into the cake.

Leave to cool in the tin for 10 mins then carefully lift out using the overhang of the greaseproof to transfer to a cooling tray.

img_1505

Whilst cooling make the ‘noses’. Put the candy melts into a microwave proof bowl and the cream in a jug. Put the candy melts in the microwave for 1 minute. then warm the cream for 30 seconds. pour the cream over the candy melts and stir well to get a nice glossy smooth ganache. Use a cocktail stick to pick up the maltesers and coat in the ganache. Tap on the edge of the bowl and swirl to remove the excess and completely coat the malteser. Place of a sheet of greaseproof on a small baking tray, repeat with all 18 and place in the fridge to set.

img_1509

If you cant easily get hold of the ready coloured chocolate use white chocolate to make the ganache and add red food colouring once the ganache is made.

To make the buttercream beat the softened butter until smooth and creamy, stir in the icing sugar and beat until smooth. Melt the white chocolate in the microwave, I find two blasts of 1 minute does the trick. Add this to the buttercream, give it a stir then beat in.

When the cake is cool spread the top with the buttercream.

img_1510

Crush the maltesers in a plastic bag with a rolling pin.

img_1511

Sprinkle the mixture over the top of the buttercream, press lightly to stick to the top, cut into 18 equal pieces (6 x 3) and pop a ‘red nose’ on each piece.


Melt in the middle chocolate puddings

An easier than you think and yet impressive make ahead dessert, its all in the timing at the end!

Ingredients

  • 100g dark chocolate
  • 100g butter
  • 55g caster sugar
  • 2 large eggs + 2 egg yolks
  • 1 tsp vanilla extract
  • 30g plain flour

Method

4 ramekins or pudding basins 175ml brush generously with melted butter and sprinkle with cocoa powder.

img_1227

Break the chocolate and dice the butter into a heatproof bowl and melt slowly over a bain marie,  it should take about 6 or 7 mins. Alternatively blast on full power for one minute in he microwave, then in 30 second  blasts until fully melted. Stir well and remove to cool for a minute or two.

Whilst the chocolate is melting whisk the sugar whole eggs and yolks together in a large mixing bowl. Whisk on high speed for 5 -10 minutes until the mixture has more than doubled in volume, is pale, thick and has a ribbon trail.

img_1228

Pour the melted chocolate around the edge of the bowl and sift over the flour, add the vanilla extract.  Gently fold the mixture in together using a metal spoon. Don’t rush this bit, it all needs to be incorporated without knocking out too much air.

img_1229

Divide the mixture between the four ramekins. Cover with cling film and place in the fridge for at least 1 hour, but you can leave them for up to 24 hours or put them in the freezer.

img_1230

When you are ready to cook them preheat the oven to 200C, place the ramekins on a baking tray into the oven for 12/3 minutes from chilled or 15 minutes if you have frozen them. Remove from the oven and leave for 1 minute (or two minutes if they were frozen). Run a knife round the edge and turn out. Serve immediately.

img_1233

Almond Crumble Mincemeat Traybake

If you are looking for a variation to your usual mincepies these bars are simple to make and taste delicious!

img_0615

Mincemeat Crumble Traybake

 Pastry

  • 1 egg
  • 125g caster sugar
  • 250 plain flour
  • 125g salted butter in small cubes
  • (or a packet of ready made sweet crust pastry you need around 275g)


Filling

  • 1 x 411g jar ready made mincemeat (or home made if you are so inclined!)
  • 1 dstp Grand Marnier/Cointreau /brandy
  • zest of one clementine

Crumble

  • 50g plain flour
  • 50g ground almonds
  • 50g soft brown sugar
  • 50g salted butter cubed
  • 50g almond flakes

Method

Butter and line with non stick baking parchment a 29x19cm shallow baking tray.  a quick and easy way to line your tin – Firstly butter generously this will help the baking parchment to stick and make lifting out much easier. Cut the paper so its large enough to sit in the tray and pop over the edges – again lifting out at the end will be easier. Squsih the paper into the tray, then where the corners are snip down to the base of the tray, tuck the snipped edged behind each other and hey presto!

To make the pastry put all the ingredients into a food processor and blitz until it starts to come together as a dough.

Tip out and briefly knead into a ball, then pop in the fridge for half an hour in a plastic bag. Don’t skip this step it will help when you roll the pastry later.

After the half hour resting roll out half the dough on a generously floured worktop.

Keep turning the pastry to make sure it isn’t sticking and this will help keep the dough even and in a rectangle shape. Roll until it is a little bigger than your tray all round. To transfer into the tray fold each end into the middle then lift into the centre of the tray, unfold and gently press into the corners.

Don’t worry if it breaks or isn’t quite big enough, this pastry is super forgiving and you can squish it back together or use a spare bit from one end to patch up any holes!

Back into the fridge for 20mins, this will help stop the pastry shrinking too much.

Preheat the oven to 200C with a baking sheet on the oven shelf.

Make the mincemeat filling by mixing in the liqueur and the clementine zest, put on one side.

img_0601

To make the crumble topping put all the ingredients, except the almond flakes, in a large bowl and rub between your finger tips to incorporate all the ingredients together. Keep going until the mixture resembles breadcrumbs and there are no lumps of butter. Stir in the flaked almonds.

If you want to make this without the nuts use 150g flour and 75g each of butter and sugar, then rub in.

Once the pastry has rested for 20mins bring out if the fridge and trim the edges of the pastry to neaten it but leave a little over hang on the edges of the tray.

Cover the bottom of the pastry with an even layer of mincemeat. Cover with the crumble mixture.

Turn the oven down to 180C and bake on the baking sheet for 30 mins or until golden brown and bubbling nicely.

Allow to cool completely and remove from the tray, cut into squares

Merry Christmas

Millionaires Flapjacks

.albumtemp-79

A quick recipe only post for you ! I made these yummy millionaires flapjacks last night for a fireworks party with our neighbours and a twitter pals have asked for the recipe so here it is!

Millionaires Flapjacks

Ingredients

Flapjack layer

  • 190g butter
  • 190g soft brown sugar
  • 70g golden syrup
  • 375g rolled oats

Caramel layer

  • 1 tin of condensed milk
  • 115g soft brown sugar
  • 75g golden syrup
  • 175g butter
  • 1tsp sea salt flakes

Chocolate layer

  • 75g dark chocolate
  • 75g white chocolate
  • 20g butter
  • sprinkles of choice


Method

Preheat the oven to 180C.

Grease and line a 29x19cm tin wth non stick parchment paper.

Melt the butter, syrup and brown sugar from the flapjack ingredients together in a large saucepan. When all melted stir in the oats and cover with the melted mixture. Turn into the lined tin and press down firmly and evenly. Bake in the preheated oven for 30 minutes until golden brown. Remove and allow to cool.

Whilst the flapjacks are baking make the caramel.

Melt all the ingredients (except the salt) together in a large pan over a medium heat, keep stirring continuously until thickens, and becomes a lovely deep caramel colour this takes 5-10mins. Remove from the heat and stir in the salt. Allow to cool.

When the flapjacks are cool spread the caramel evenly over the top. Allow to set in the fridge.

Next melt the chocolates and butter together in a microwave proof bowl by microwaving on half power for 1 minute, remove and stir then return for another minute on half power. Repeat if required for 30 second bursts. Stir well and spread evenly over the cooled caramel. Tap the tin on the work top to ‘settle’ the chocolate. Cover with sprinkles of your choice.  ( I used some autumn mix ones from this months Cake Bag subscription)Allow to set solid in the fridge, cut into squares to serve.

.albumtemp-78

Free From Cake

Usually when I’m asked to make a ‘free from’ cake it means no gluten, maybe no dairy or perhaps no eggs all of which are do-able and there are lots of recipes online to use. However for this cake I was asked to make it, processed sugars free, dairy free, low in saturated fats and ideally with no white flour. Not an easy task lots of recipes offered one or two of these options but I couldn’t find one that did all of the above. Luckily I could use eggs and was allowed either almonds or pistachios so I decided to try to combine a few ideas and come up with my own recipe. My first try was lovely on first eat but didn’t last and needed to be a bit sweeter. However a few tweaks later and I managed to find a recipe that would hold as a big cake and work in mini form too.

So here it is, my Olive oil and Almond chocolate cake!

Olive oil and Almond chocolate cake 

Ingredients

150g spelt flour

50g ground almonds

25g cacao powder

1 1/2tsp baking powder

pinch salt

175ml olive oil

3 eggs

200g date syrup

Filling/topping

1-2 ripe avocados

50ml maple syrup

50g cacao powder

1 tsp vanilla extract


Method

Grease and line two 6 inch tins with olive oil and greaseproof paper. Preheat the oven to 150C.

Measure all the dry ingredients into a bowl and whisk together to combine and get rid of any lumps.

img_0353

Put the eggs and date syrup together into a stand mixer and whisk until pale and thickened. this can take a good 10 minutes!

img_0355

Gradually add the oil in a continuos stream whilst whisking until combined.

Fold on the dry ingredients until all combined.

img_0357


Share the mixture between the two tins, bake for 25 mins or until a cocktail stick comes out clean.

Turn out onto a cooling try and allow to become room temperature.

To make the filling, mash the avocado add the syrup, vanilla and cacao powder mix in well, blend with a stick blender to make completely smooth, add more syrup and cacao powder if needed.

img_0362

Fill and top the cake with the ‘frosting’, I decorated my cake with dried flowers.

I managed to scale this recipe up for a celebration cake and some mini cupcakes too.

.albumtemp-77.albumtemp-76

Afternoon Tea

We all love the luxury of going out for afternoon tea don’t we? But you can just as easily create afternoon tea yourself at home. BBC Good Food magazine recently asked me for my top shopping tips that will help you make afternoon tea at home to celebrate Afternoon Tea week (14-20 August).

img_9751

This is my version of afternoon tea together with links to easy recipes, we enjoyed ours to celebrate my eldest daughters birthday recently.

.albumtemp-68

So what did we have? Firstly I steered clear of the standard sandwich offerings, the closest I got were salmon and cream cheese pin wheels made using large flour tortillas spread with cream cheese layered up with smoked salmon then rolled tightly. I popped them in the fridge for half an hour to set firm before slicing into ‘wheels’. Perfect bite size and lighter than a traditional sandwich.

.albumtemp-72

My family love a sausage roll and these ones using caramelised onion sausages and ready made puff pastry were done in no time, remember to roll the pastry thinly, cut with a sharp knife and glaze with egg before baking.

.albumtemp-71

Next on the savoury front were some goats cheese and sticky onion squares. Again using shop bought puff pastry, some simple caramelised red onion and soft goats cheese. I based my recipe on this BBC Good Food one, just making one whole tart (half a packet of puff pastry) which I cut into squares.

The focaccia is my own basic focaccia recipe, topped with black olives, sunblush tomatoes and crumbled feta just before it goes in the oven.

Focaccia

Ingredients
300g Strong bread flour
5 g salt
7g sachet fast action yeast
1tbsp olive oil , plus extra for kneading
240ml tepid water

To finish
Black Olives, sunblush tomatoes, feta

Method
Weigh the strong flour into a large bowl, on one side place the yeast on the other place the salt. Don’t mix until you have everything else ready.
Stir in the tepid water. You can tell if the water is the right temperature as you will not be able to feel it being either warmer or cooler than your finger!
Add the 1 tbsp of olive oil and stir in well. You should have have a very sticky dough, add a little more water if it isn’t sticking to your hands!
Drizzle some oil onto your work bench and your hands then using a dough scraper empty the dough onto the worktop.
Knead with one hand for 10 minutes (set yourself a timer its longer than you think!!)
The dough will be very wet so keep scraping back into the centre and from your hand using the dough scraper. I find a circular motion works well for such a wet dough.
Return to an oiled bowl for 1 hour to prove.
When doubled in size, preheat the oven to 220C.
Turn the dough into an oiled tray (18X 30cm). Do this by using the scraper and ‘pour’ the dough into the tin.
With wet fingers ease the dough to the shape of the tin, trying not to knock out too much of the air.
Leave to rise for a 45mins.
When doubled in size again, using and oiled finger make indentations in the dough in lines to get the traditional focaccia dimples.
Cut the olives in half and chop up the tomatoes, sprinkle over the top and finish with some crumbled feta. Drizzle with olive oil from the sunblush tomato pot.
Reduce the oven temperature to 210C and bake for 20 – 30mins until risen and golden
When cooked remove and allow to cool for 5 minutes.
Drizzle with more olive oil and sprinkle with a little more salt to taste.

For the cakey offerings, we had meringue kisses which I make following the Meringue girls recipe.

Honey and rose madeleines made from the lovely book by Jill Colonna called Teatime in Paris. The book has lovely simple recipes like these madeleines as well as more complex french patisserie such as choux and macarons.

img_8844

The cupcakes were a Mary Berry recipe, just a standard vanilla cake really, but I filled them with a chocolate ganache using my Lakeland cupcake corer

img_9721

and topped with butter icing swirls using Sugar and Crumbs strawberry milkshake flavour icing sugar. I use and open star nozzle to achieve this look.

.albumtemp-75

Finished with a bit more chocolate ganache and some sprinkles. the overall effect was like a neopolitan ice cream, perfect for a summers day.

.albumtemp-69

The two big cakes were both lemon and elderflower flavour, both lemon cake with elderflower icing, again using the Sugar and Crumbs flavoured icing sugar, one in buttercream and the other in drizzle icing.

The large tiered cake is a semi-naked one, following the method in my How I make a Naked Cake  blog post. Decorated simply using fresh edible flowers and meringues. Nationwide access to edible flowers can be found online via Maddocks Farm Organics, they will advise you of flowers in season and which varieties are safe to use on a cake. I would advise against using supermarket or florist flowers even if they are edible varieties, unless they are being sold specifically as edible in the grocery sections. My flowers this week are from a local grower There May be Bugs who uses organic techniques and is a fabulous source for me if I only need a few blooms.

.albumtemp-70

The Bundt cake followed the Build a Bundt, recipe by the queen of bundt’s Dolly Bakes. I added the zest of a lemon to the mix then once cooked I soaked it in lemon syrup. The drizzle was made with the Elderflower natural icing sugar from Sugar and Crumbs and the crystallised flowers were from the Edible Botanist and give a fab alternative to fresh flowers as they last longer on the cake but still look and taste great. A bundt tin is a great way to add style to an otherwise quite plain cake, the tins by Nordicware are amazing quality and well worth the extra that they cost. Be careful though their pretty designs can become quite addictive. Try John Lewis for the latest designs or TK Maxx for a bargain.

.albumtemp-73

No afternoon tea is complete of course without scones and clotted cream, we had ours with homemade strawberry and prosecco jam too! The clotted cream naturally has to be British family brand Roddas, and once again Mary Berry wins the day with her recipe for Devonshire scones

.albumtemp-74

This was such a lovely opportunity to get out all the best tea china and my pretty cake stands that we will definitely do it again, although I think I need to invite more people next time as we had enough food to feed the whole street!

Don’t forget to get the August issue of BBC Good Food magazine to see my article!

img_8926

A final thank you to Birgit Mons Photography for turning a rather reluctant model into some fabulous headshots for the magazine article – you really worked wonders!

All the items and suppliers I have recommended are ones I use regularly in my kitchen. I have not received any payment or goods in lieu of endorsement.